
Rifle cleaning is very personal; some people do it after every trip out, and some do it only occasionally. Rimfires seem to thrive on not being cleaned at all! One thing is sure: we will need to clean it at some stage. This is how I tend mine:
I will usually clean my target rifles after each range session and stalking and vermin rifles after a few trips. If a rifles get wet, it will be cleaned by default.
I use the following equipment to clean all my rifles.
A one-piece rod, long enough to clear the muzzle end and allow for a bore guide to bridge the trigger group. I like a stainless rod without any plastic covering over the shaft as these can become damaged and let the inside metal rust. They can also get impregnated with a little bit of rubbish that you don't want down your rifling.
The bore guide spans over the trigger to save debris from cleaning patches or solvents entering the trigger and causing damage. If my barrel is on the way out, I'm only keen on bronze brushes, and I must give it some tough love.
I tend to use Nylon brushes like the Iosso blue ones, which are as stiff as Bronze but not as scratchy as one. I also prefer to use an Aluminium Jag made by BoreTech or similar, as Ali will not show copper fouling and give a false reading, but more of that later.
On the muzzle end, I'll use a patch catcher to help keep dropped dirty patches to a minimum. I will also use patches of the correct size for the bore and a solvent like BoreTech Eliminator for both Carbon and Copper removal.
SAFETY
Always check your barrel is free from any cleaning patches or foreign bodies before shooting.
Never sniff the solvent.
Never drink the solvent.
Please clear up any spillages as soon as possible.
If you are trying to figure out what you are doing, please get help from somebody who does!
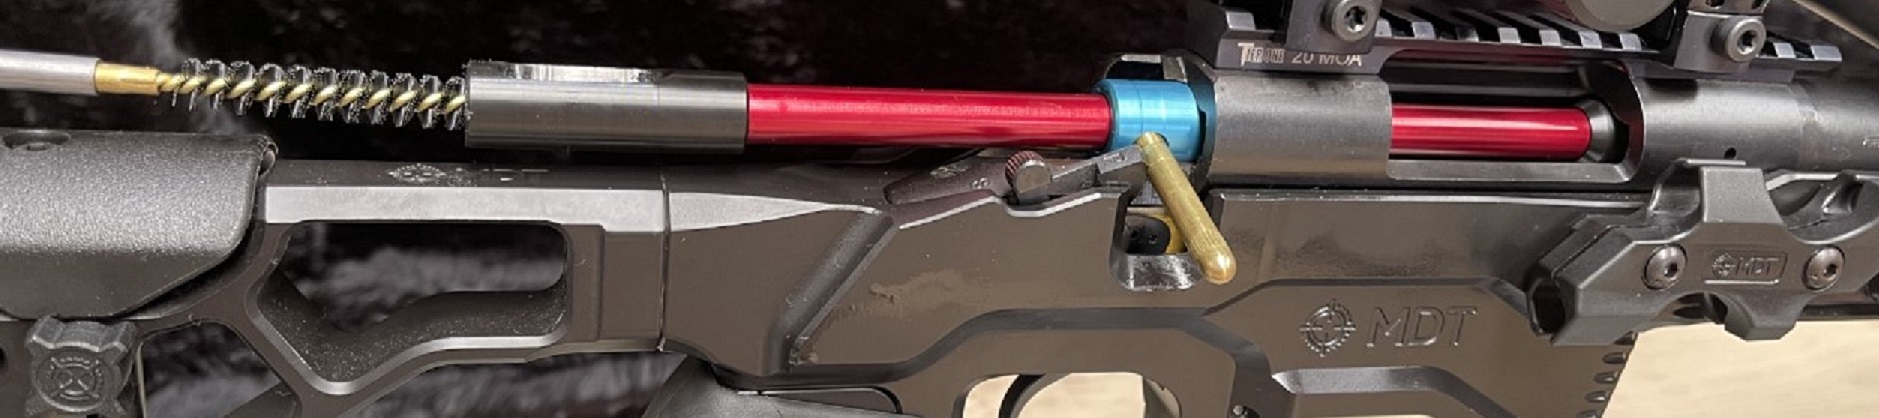
Step 1—Fit the bore guide into the chamber and ensure it goes home. Then, could you attach the patch catcher at the muzzle end? I also have an old rag under the bore guide to protect the stock from leaking solvents.
Step 2 - Using the nylon brush and a little cleaning solvent like the Eliminator, I put a wet brush down the barrel several times, going through to the patch catcher. I'm trying to get the bore wet and move any larger debris simultaneously.
Step 3 - I will leave the bore to soak for about 20 minutes while I make a cup of tea.
Step 4—Now, using the patches on the Ali jag, I will put a dry-clean one through the barrel. Depending on the residue inside, it should come out blue or black. Blue will indicate Copper fouling, and black will indicate Carbon fouling.
Step 5 - I will run a few down the bore using more patches with the solvent on.
Step 6—Depending on whether you see more blue or black fouling, you can now use a more specific solvent, much like BoreTech's Carbon or Copper remover. Several brands are doing the same thing; I'm just using Bore Tech as an example.
Step 7—Once you have run a few wet patches through, run a dry-clean one down the bore. This will come out dirty but should be much cleaner than the wet ones. Now, you can run a wet one down, which should come out clean or cleaner; you may need to repeat step 6 until this happens.
Step 8—Once you are confident that the bore is clean, you can run a couple of lightly oiled patches down the barrel to help prevent rust. I like running one clean patch down to remove any excess oil.
Step 9—Your rifle should now be cleaned and oiled, ready for putting away. Take a little time to clean your jags and rods to prevent them from getting sticky and horrible.
Extra Step for Carbon Ring Removal
What is a carbon Ring? A carbon ring is a ring of carbon formed after firing live ammunition through the barrel. It looks like a dull, black ring encircles the barrel around where the shell casing and bullet separate during the firing process.
To clean the carbon ring, I’ll use a nylon brush, which will be one calibre too big, so a .30 in a 7mm, for example, on an action cleaning rod and rotate that 30 or so times on the neck to chamber junction to remove the carbon ring. The solvent will already be there from the cleaning, so adding more is unnecessary. When you do the next patch, you’ll get a patch of carbon to come out with.
Extra Step for Cleaning the Action
I will clean the action with an action cleaning kit, a short cleaning rod, and a military-style 4x2 cleaning cloth and mop. I wrap some 4x2 around the mop to keep it clean for future use and run it into the chamber. This will take out the majority of the debris in there. I will use a lug cleaner from the cleaning kit to clean around the bolt lugs where they meet the chamber on their leading side. Once I'm happy, the room will be clean. A little bolt grease on the bolt raceways is all you need.
To clean the bolt, I will only lube the moving parts and behind the bolt lugs. If the bolt needs stripping, I will use a bolt removal tool to deny it. Once stripped, I can clean, lube, and reassemble it.
I made a series of YouTube clips on this subject a few years ago. Part 1, Part 2, and Part 3 can be seen here.
JUST REMEMBER THAT MOST CLEAN GUNS WILL NOT SHOOT ON ZERO STRAIGHT AWAY; THEY WILL NEED TWO OR THREE SHOTS DOWN THE BARREL TO FOUL THEM AND GET THEM BACK TO THEIR ZERO